What BTU Mini Split for a 3-Car Garage or Shop (700 to 900 Sq Ft)?
For a 700- to 900-square-foot three-car garage or shop, an 18,000 BTU mini split may suit a well-insulated space with a moderate ceiling and limited air leakage. A 24,000 BTU mini split is often the safer starting point for a draftier, poorly insulated garage, a taller shop, or a space with substantial winter heating demand. Neither size is automatic: insulation, climate, air leakage, windows, doors, and how you use the space all matter.
Garages usually need more capacity per square foot than interior rooms. A practical first-pass adjustment is to size roughly 30% to 50% above an interior-room estimate, then check that estimate against the mini split’s actual heating and cooling performance. That adjustment is a screening tool, not a substitute for a load calculation—especially in a cold-winter climate.
Quick Answer: 18,000 or 24,000 BTU?
Use the table below as a starting point. It assumes a typical residential garage ceiling around 8 to 10 feet. A high ceiling, uninsulated overhead door, leaky walls, or frequent door opening can push the load higher. Conversely, a tightly sealed, well-insulated garage may need less capacity.
Garage conditions Starting size to investigate What to check 700–800 sq ft, insulated walls and ceiling, decent air sealing, occasional use 18,000 BTU Heating output at your winter design temperature and cooling capacity at your summer design temperature 800–900 sq ft, average insulation, some drafts, regular workshop use 18,000–24,000 BTU Door leakage, ceiling height, window area, and equipment heat 700–900 sq ft, weak insulation, leaky overhead door, tall ceiling, or cold climate 24,000 BTU or a professionally calculated option Low-temperature heating capacity and whether the unit can maintain setpoint in cold weatherA bigger unit is not automatically better. An oversized system can cycle on and off more often, potentially reducing comfort and efficiency during mild weather. The right unit should have enough capacity for the garage’s real heat loss while also being able to turn down when the load is low.
Why Garages Need More BTUs Than Interior Rooms
Interior-room sizing charts often assume insulated walls, consistent temperatures on the other side of those walls, modest ceiling heights, and relatively little outdoor air leakage. A garage breaks many of those assumptions. Its large overhead door may be poorly insulated or leaky, the slab can feel cold, and the space may have exposed framing or an uninsulated ceiling. Opening the garage door can also dump conditioned air quickly.
That is why adding roughly 30% to 50% to a basic interior-room estimate can be a useful first check. But don’t treat that percentage as a formula that guarantees the right answer. A 900-square-foot, well-insulated attached garage can have a lower load than a 700-square-foot detached shop with a tall ceiling and a drafty door.
Check these factors before choosing a size
- Insulation: Note whether the walls, ceiling, and overhead door are insulated—and whether insulation is installed properly.
- Ceiling height: A 12-foot shop has more air volume than an 8-foot garage with the same floor area.
- Air leakage: Check door seals, the threshold, wall penetrations, and the gap around the overhead door.
- Windows and sun exposure: Large or sun-facing windows can add a meaningful cooling load.
- Use and equipment: People, lighting, compressors, welders, and other equipment add heat. Some activities also create fumes or dust that a mini split is not designed to remove.
- Climate: Look at local winter design temperatures and the heat pump’s capacity at low outdoor temperatures, not just its headline BTU rating.
Air sealing and insulation are often better first upgrades than buying a larger heat pump. Weatherstripping the overhead door, sealing penetrations, and insulating the ceiling can improve comfort while reducing the load the mini split has to cover.
When an 18,000 BTU Garage Mini Split Makes Sense
An 18,000 BTU garage mini split is worth investigating when the space is closer to 700 or 800 square feet, has good insulation and air sealing, and does not have unusually high ceilings or major solar gain. It may also be a sensible choice if the garage is attached to the house and its shared wall is insulated.
For heating, don’t Get more information choose based only on the unit’s nominal capacity. Heat pumps deliver less heat as outdoor temperatures fall, although the amount varies by model. Compare the manufacturer’s extended performance data at temperatures relevant to your area. If the unit’s output drops https://annamaid.com/how-much-can-i-save-by-avoiding-a-new-230v-circuit-200-to-800/ below the garage’s heat loss on cold days, you may need supplemental heat or a different model.
When a 24,000 BTU Garage Mini Split Is More Appropriate
A 24,000 BTU garage mini split is a stronger candidate for a 900-square-foot shop, a space with average or weak insulation, a high ceiling, or a garage that must stay comfortable during cold weather. It can also provide extra recovery capacity after the overhead door has been open—but no mini split can instantly restore the temperature after a long period of open-door use.
For a large garage heat pump, compare both heating and cooling performance at your local design conditions. A unit that looks adequate from its nameplate rating may not deliver enough heat in deep winter. Also check its minimum output: a model that can modulate down to a low capacity is less likely to short-cycle when the garage needs only a little heating or cooling.
Zone Air vs. MRCOOL for a DIY Garage Installation
When comparing Zone Air and MRCOOL, separate the sales channel from the equipment itself. Zone Air may be a place to compare available systems, get product guidance, or ask about installation options; MRCOOL is a recognizable manufacturer with products marketed for different installation approaches. The exact model, included accessories, warranty terms, and local code requirements matter more than the company name alone.
MRCOOL’s DIY-oriented offerings are often considered by homeowners who want a simplified installation process. Before ordering, confirm that the specific model’s line-set connections, permitted line-set length, required tools, and installation instructions match your project. “DIY” does not mean every task is tool-free, code-exempt, or appropriate for every homeowner. Electrical work and mounting still need to meet the manual and local rules.
If you’re looking at equipment through Zone Air, ask for the exact model number and compare its submittal sheet with the MRCOOL model you’re considering. Verify capacity at low outdoor temperatures, included line-set length, indoor-unit airflow, warranty requirements, and whether a licensed installer is required for warranty coverage. Reviews can help identify recurring service or support issues, but they do not replace the installation manual.
Don’t let extra line set dictate the layout
Measure the route from the indoor head to the outdoor condenser before buying. Some kits have a fixed or limited line-set length. If you end up with more line than the installation allows you to shorten, don’t assume you can coil the excess behind the condenser. Coiling can conflict with manufacturer instructions and service clearances. Confirm approved line-set routing and length with the manual or manufacturer, and plan the condenser location accordingly.
115V Plug-In or 230V Dedicated Circuit?
The voltage choice is model-specific. Some smaller mini splits use 115V power, while many 18,000- and 24,000-BTU systems require 230V. Don’t assume a plug-in unit is available at every capacity, or that a unit can use an existing garage outlet. Check the nameplate and installation manual for the required supply voltage, minimum circuit ampacity (MCA), and maximum overcurrent protection (MOCP).
- 115V: May simplify power access for eligible models, but the available capacity and circuit requirements vary. The unit may still require a dedicated circuit and a properly rated receptacle or disconnect.
- 230V: Common on higher-capacity systems and often calls for a dedicated branch circuit. Installation may require new wiring, a breaker, and an outdoor disconnect.
- Either voltage: Don’t select a breaker by guessing from the BTU rating. Follow the manufacturer’s MCA and MOCP values and have the panel capacity and wiring checked.
A plug-in connection is not a reason to skip electrical checks. Garages may already have heavily loaded circuits for tools, freezers, or other equipment. If the panel is full, the service is near capacity, or you’re unsure about conductor size and protection, ask a licensed electrician to assess the installation before purchase.
SEER2, HSPF2, and What the System Costs to Run
SEER2 measures seasonal cooling efficiency, while HSPF2 measures seasonal heating efficiency under standardized test conditions. Higher ratings generally indicate greater efficiency under those test conditions, but actual energy use depends on climate, setpoints, insulation, system sizing, and how often the overhead door is open.
To make a rough operating-cost estimate, use the unit’s electrical input or performance data—not BTUs alone. A simple estimate is: kilowatt-hours used × your electricity rate = energy cost. The unit’s rated capacity is thermal output, not the electricity it draws. Manufacturers’ submittal sheets may include power input at specific operating conditions; actual consumption will vary as an inverter system changes speed and outdoor temperatures change.
In a cold climate, pay particular attention to the heat pump’s heating capacity and efficiency at low outdoor temperatures. A strong HSPF2 rating is useful for comparisons, but it does not tell the whole story at your exact winter temperature. Compare extended performance tables and check whether the unit needs supplemental heat for the coldest days.
Condenser Pad or Wall Brackets?
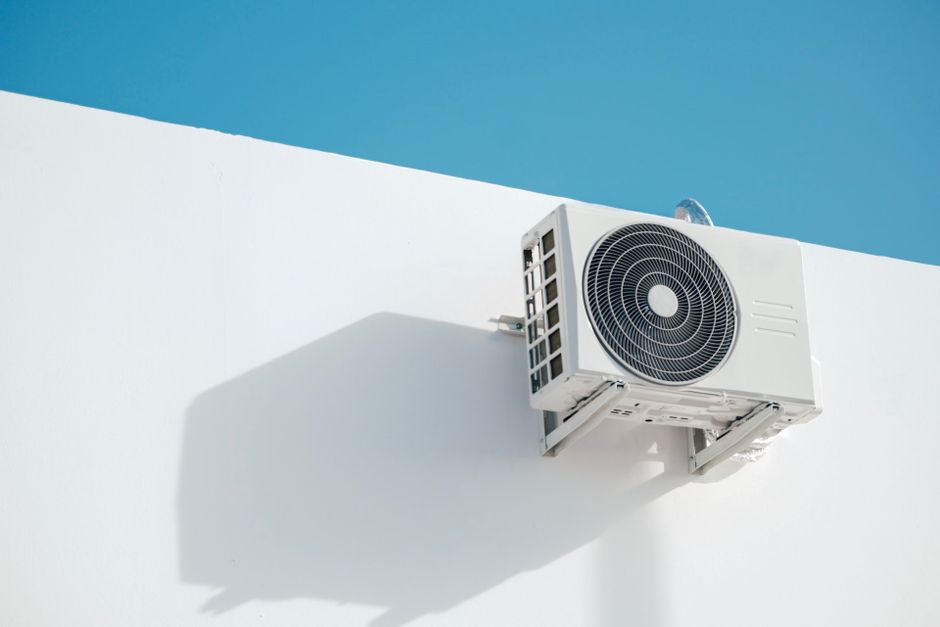
The outdoor unit can sit on a stable condenser pad or be mounted on wall brackets, if the manufacturer allows that arrangement. A pad is straightforward when there is a level, well-drained location. In snowy areas, elevate the unit enough to keep it clear of snow and allow defrost water to drain without freezing into a damaging ice mound.
Wall brackets can keep the condenser above snow and reduce ground-level exposure, but the wall must support the load and vibration. Follow the required clearances around the unit so airflow is not blocked. Either way, choose a location with room for service, protection from roof avalanches, and a practical route for the refrigerant lines and electrical connection.
A Practical Sizing and Buying Checklist
- Measure the actual space. Record floor area, ceiling height, insulation, window area, and overhead-door condition.
- Improve the envelope first. Seal drafts and address weak insulation where practical.
- Compare 18,000 and 24,000 BTU models. Check minimum output as well as maximum capacity to avoid oversizing.
- Review cold-weather performance. Confirm heating capacity at local winter temperatures.
- Check electrical requirements. Match voltage, MCA, and MOCP to the installation, and verify the panel can support the circuit.
- Plan the installation route. Confirm line-set length, indoor-head placement, condenser clearances, and drainage.
- Read the warranty and local rules. Some work may require a qualified installer or permits. Angi can help homeowners research local contractors, but compare licensing, insurance, references, and written scope before hiring.
Bottom Line
For a 700- to 900-square-foot garage or shop, start by comparing an 18,000 BTU unit for a well-insulated, tighter space with a 24,000 BTU unit for a draftier, taller, or colder one. Garage loads can run roughly 30% to 50% above interior-room estimates, but a load calculation and low-temperature performance data are more reliable than a square-foot rule. Choose the system that fits the building, confirm its electrical requirements before purchase, and treat insulation and air sealing as part of the heating-and-cooling upgrade.